How to Wire a Dual Volume and Tone Setup: 5 Easy Steps for Optimal Sound!
Upgrading your guitar with a dual volume and tone setup can significantly enhance your sound customization. Whether you’re a seasoned musician or just starting, wiring this setup is a valuable skill. It allows you to adjust volume and tone for each pickup, offering greater control over your sound output. This guide will walk you through the process, making it seamless and enriching your playing experience.
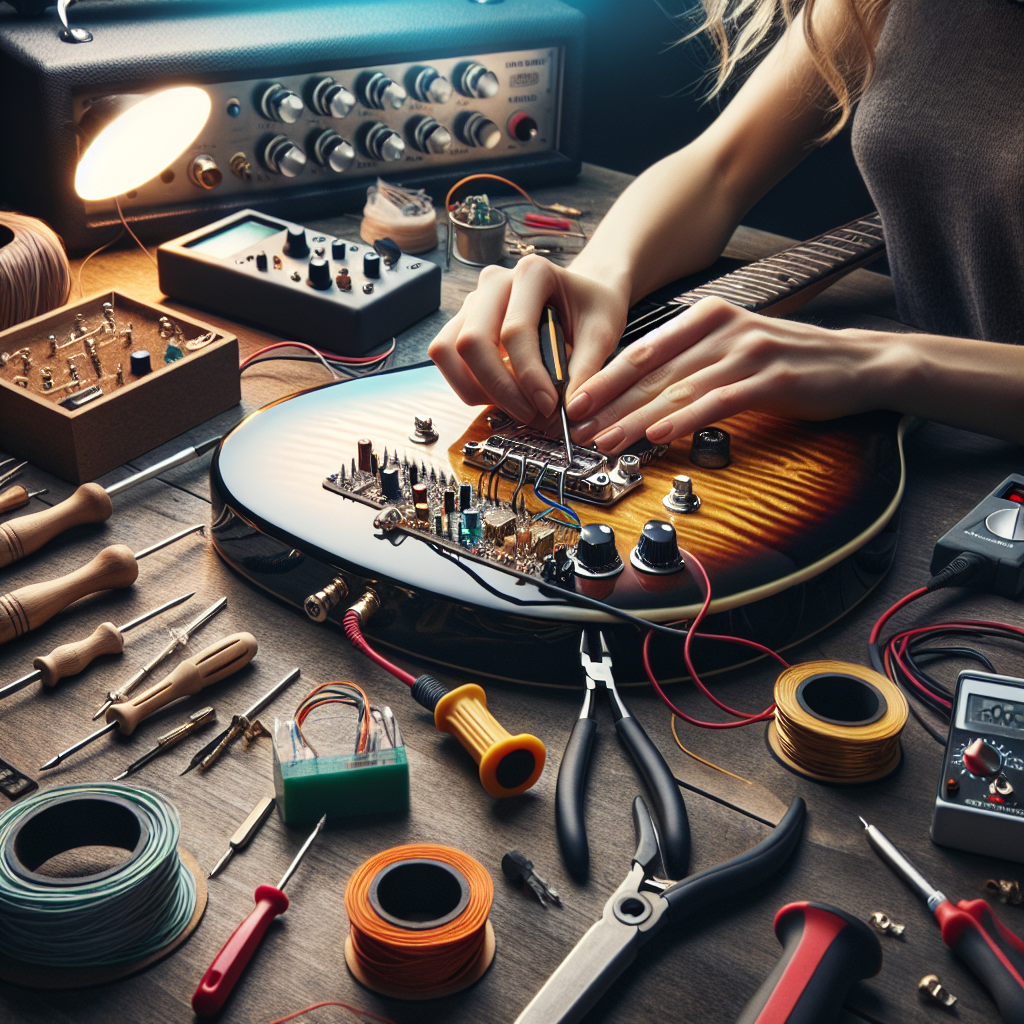
Step 1: Gather the Necessary Tools and Materials
Before beginning, ensure you have all the tools and materials needed. You will need:
- A soldering iron and solder
- A screwdriver set
- Wire cutters and strippers
- Four potentiometers (two for volume, two for tone)
- Capacitors (commonly 0.022μF or 0.047μF for guitars)
- Shielded wire
- A wiring diagram specific to your guitar model
Having everything ready will ensure a smooth process and prevent interruptions.
Step 2: Remove the Guitar’s Backplate
Begin by unscrewing your guitar’s backplate to access the control cavity. Carefully set the screws aside to avoid losing them. This step allows you to reach the existing wiring without damaging any components.
Step 3: Install the Potentiometers
Place the four potentiometers in the control cavity. Often, the order is as follows: neck volume, neck tone, bridge volume, and bridge tone. Secure them using the nuts provided, and ensure they are firmly in place. The correct positioning of the pots is crucial for optimizing sound control.
Step 4: Connect the Wiring
Follow your wiring diagram, connecting the pickups to the pots using shielded wire. Solder each connection to ensure stability and reliability. This step includes attaching the wires from the pickup switch to each volume pot and connecting the tone pots with capacitors to the volume pots. Remember to ground all components correctly to avoid noise interference.
An excellent resource for specific wiring diagrams would be Seymour Duncan’s Wiring Diagrams. They offer a range of diagrams tailored to different guitar models and setups.
Step 5: Test and Adjust Your Setup
Once you’ve completed the wiring, replace the backplate and restring your guitar. Plug it into an amplifier, and test each volume and tone control. Listen for any issues like hum or crackling, which usually indicate improper grounding or a cold solder joint. Make necessary adjustments to ensure clear sound output and optimal functionality.
FAQs
1. What are the benefits of a dual volume and tone setup?
A dual volume and tone setup allows independent control over each pickup, offering more sound variations and customization. This setup is particularly beneficial when switching between rhythm and lead during a performance.
2. How do I know which potentiometers and capacitors to use?
The typical values are 250k potentiometers for single-coil pickups and 500k for humbuckers. Capacitors typically range between 0.022μF and 0.047μF. The choice depends on your desired sound; higher capacitor values yield more bass.
3. Are there specific tools necessary for soldering?
Yes, using a good quality soldering iron and lead-free solder is crucial. Tools like heat-resistant mats, third-hand soldering stands, and wire strippers will make the process easier and safer.
4. What if my guitar sounds quiet after wiring?
A quiet sound could indicate a poor connection, often from cold solder joints. Re-check all connections and ensure everything is grounded properly. Ensure your tone pots are not closing off the circuit path when fully rolled off.
5. How do capacitors affect sound?
Capacitors shape the tone by filtering out certain frequencies. Higher capacitance allows more low-end frequency to pass through, resulting in a warmer tone.
6. Can I install additional switches or mods?
Certainly! Push-pull pots or mini toggles can be added for phase-reverse or coil-split functions, offering even greater control over your guitar’s tonal capabilities.
Conclusion
Wiring a dual volume and tone setup may seem daunting, but with careful attention to detail and the right tools, it can be rewarding. This modification provides enhanced control and a broader tonal palette, transforming your playing and performance. Don’t hesitate to experiment and make adjustments; the more you explore, the more unique your sound can become. Enjoy the new dimensions this setup adds to your playing experience!